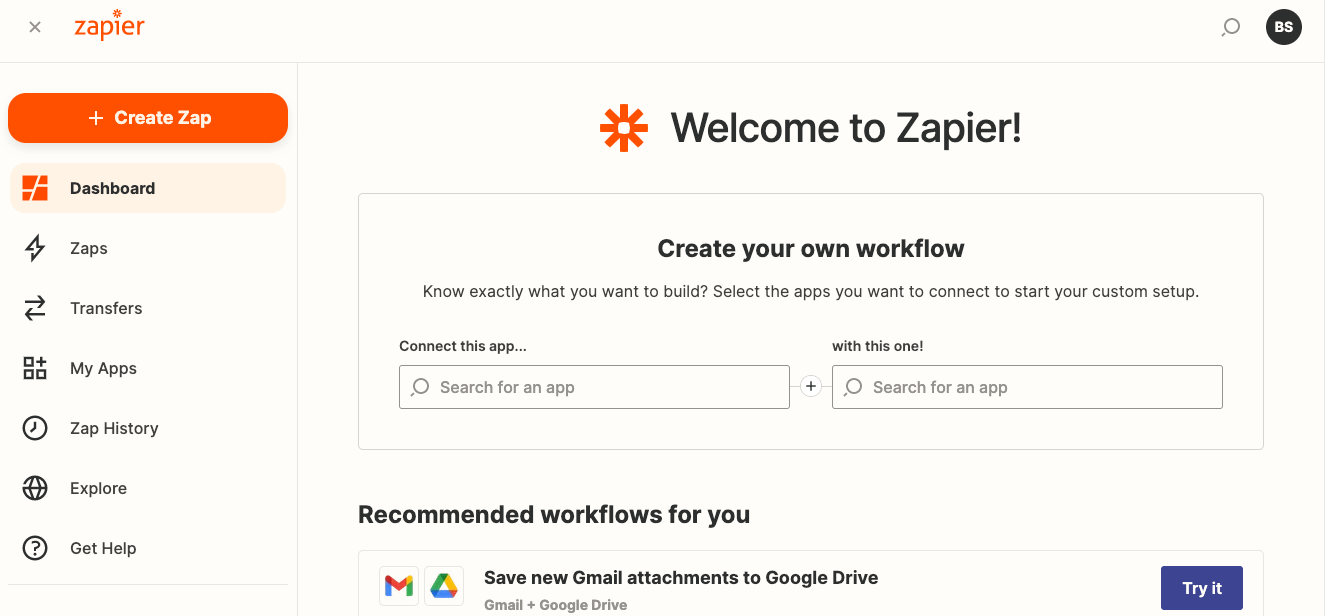
1 To get started, log in to your Zapier Account to create the Zap/Workflow.
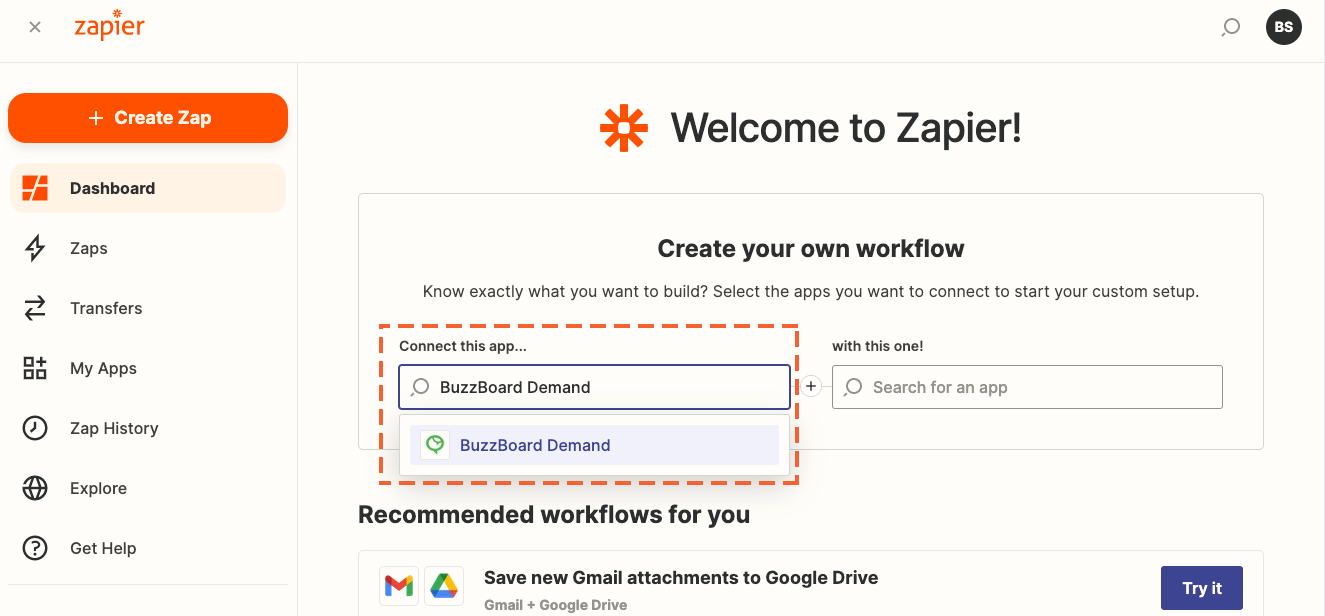
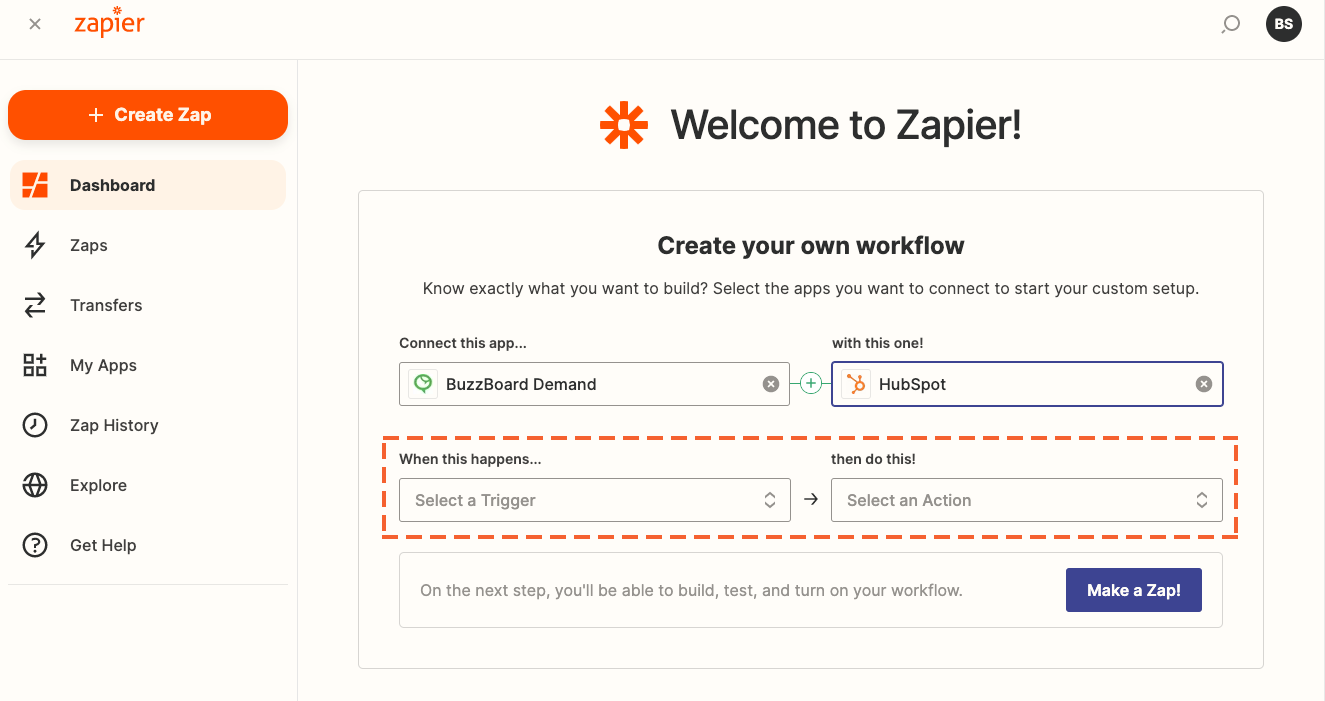
2 Under the ‘Connect this app…‘ search bar, enter BuzzBoard Demand, and click on the BuzzBoard app suggested in the search results.
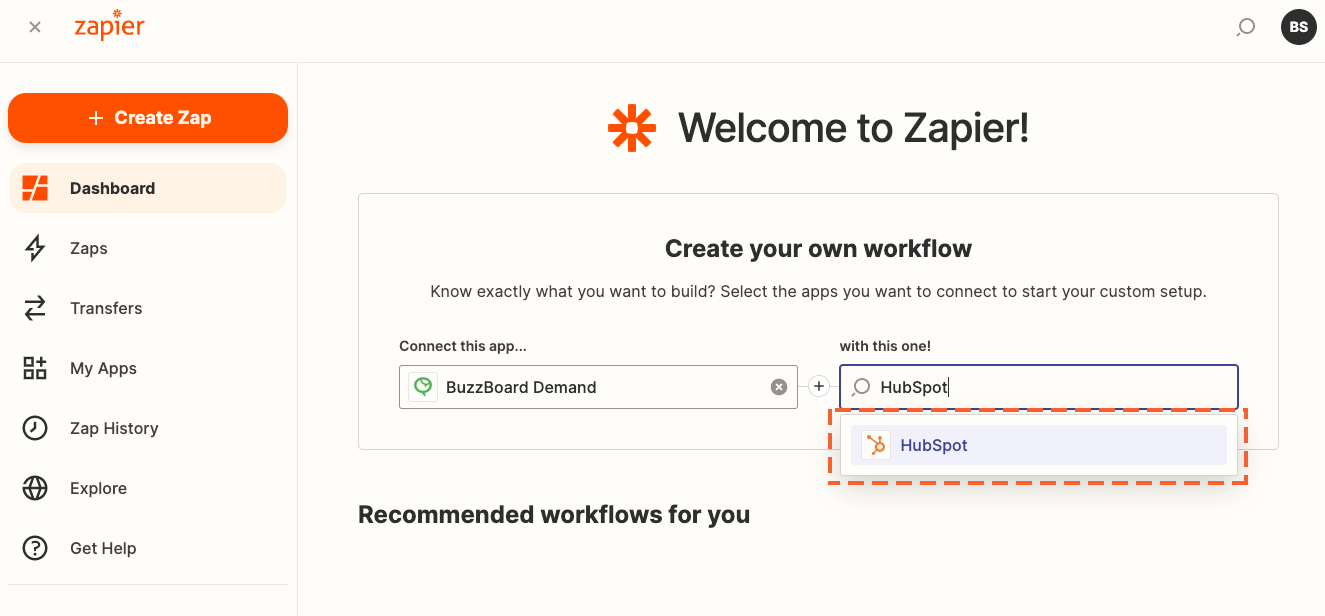
3 And, under the ‘with this one!’ search bar, select your preferred app that you would like to connect with BuzzBoard Demand. e.g. HubSpot, Pipedrive, ActiveCampaign, Marketo, etc.
As an example, HubSpot has been chosen as the preferred app.
4 As soon as you have selected your preferred app, you are asked to Select a Trigger (When this happens…) and Select an Action (then do this!).
5 To sync prospects from BuzzBoard Demand to HubSpot, select New Prospect as a trigger (When this happens…) in BuzzBoard Demand and select Create a Company as an action (then do this!) in HubSpot. So, whenever a new prospect is added in BuzzBoard Demand a new company will be created in HubSpot.
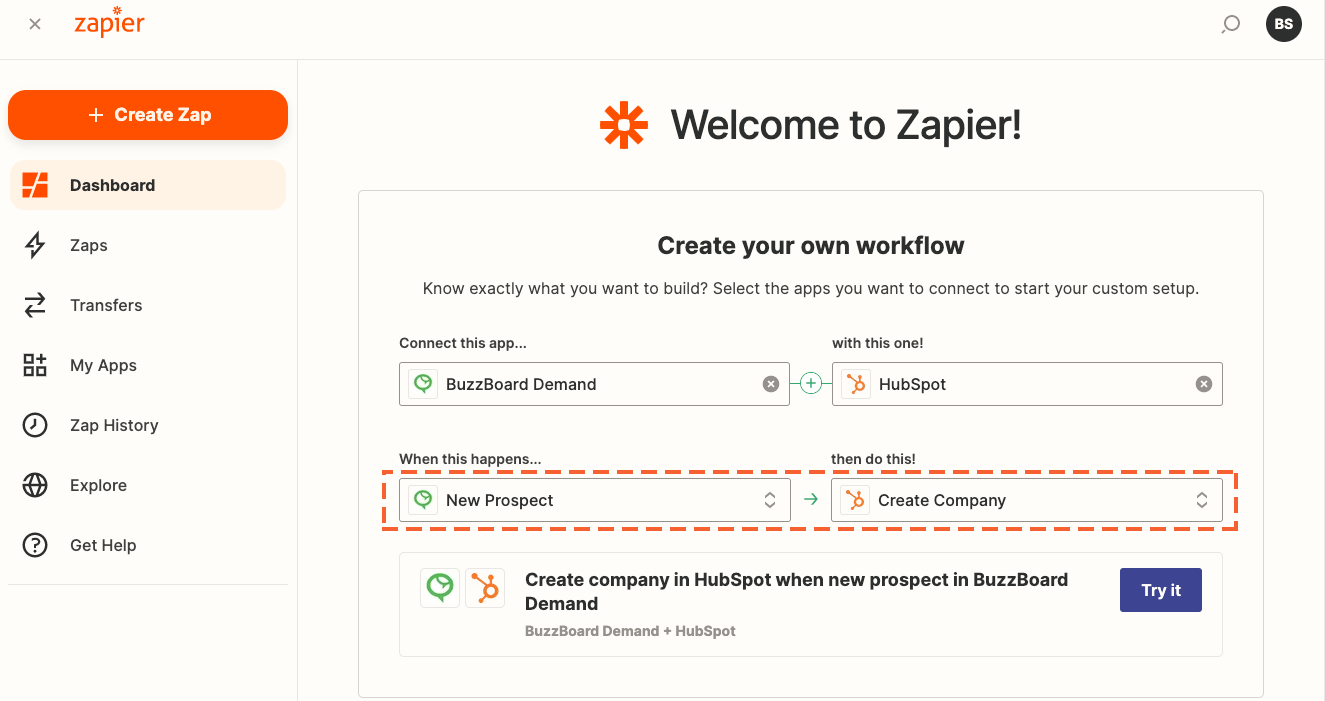
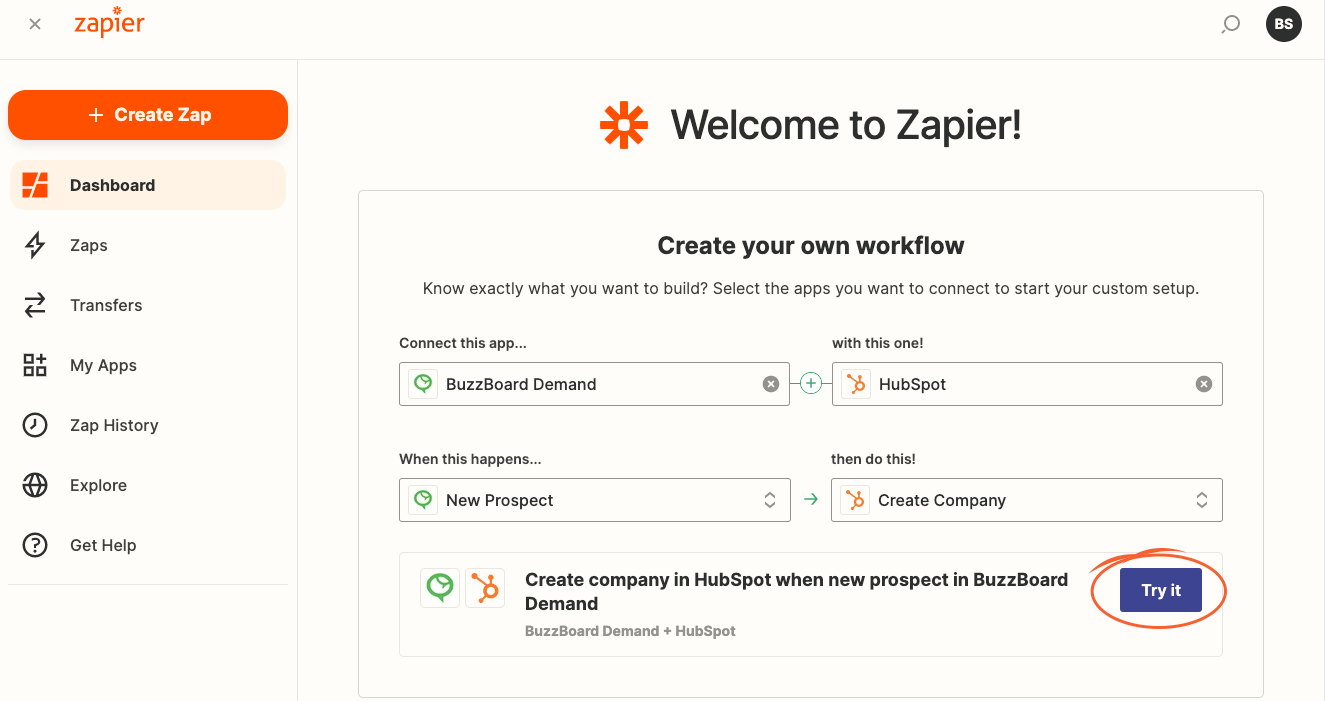
6 After selecting the Trigger and Action, click on the Try it button.
7 Clicking on the Try it button, prompts you to connect your BuzzBoard Demand account to Zapier. If your BuzzBoard Demand account is already linked to Zapier, you can simply select it and click Next.
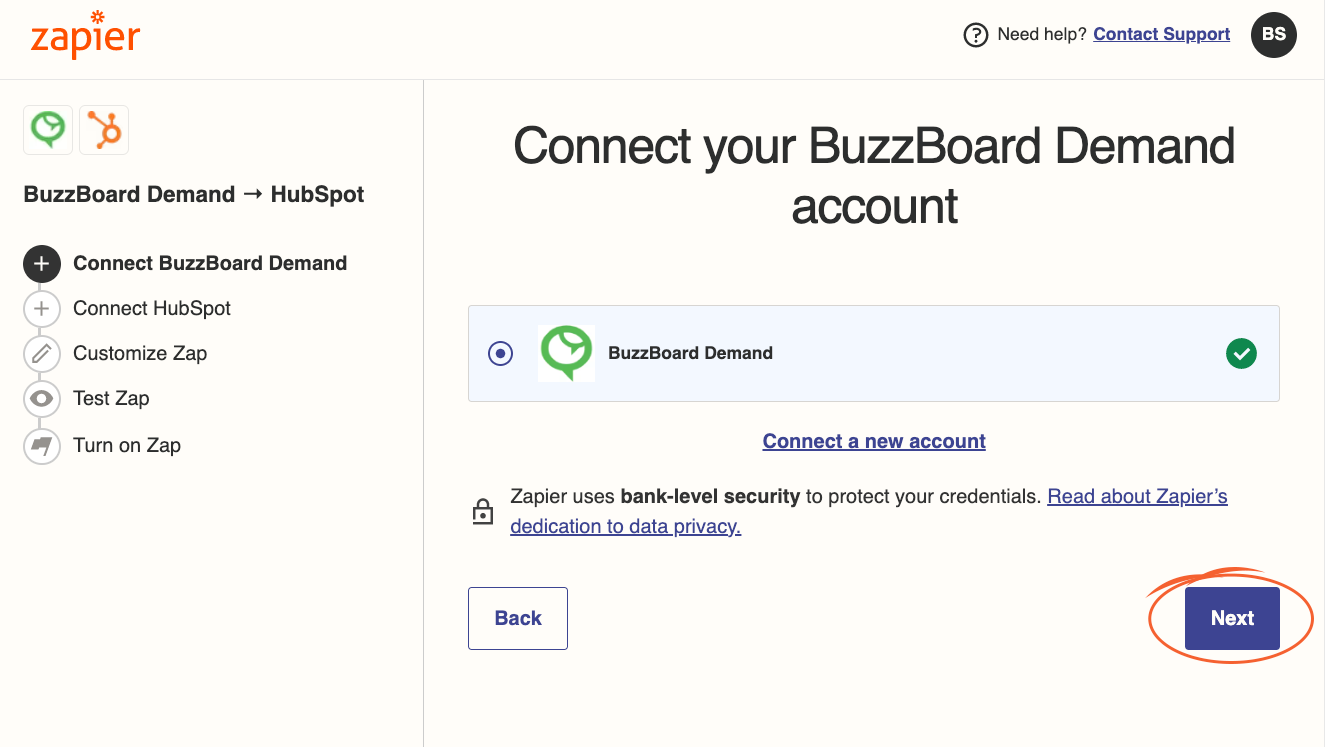
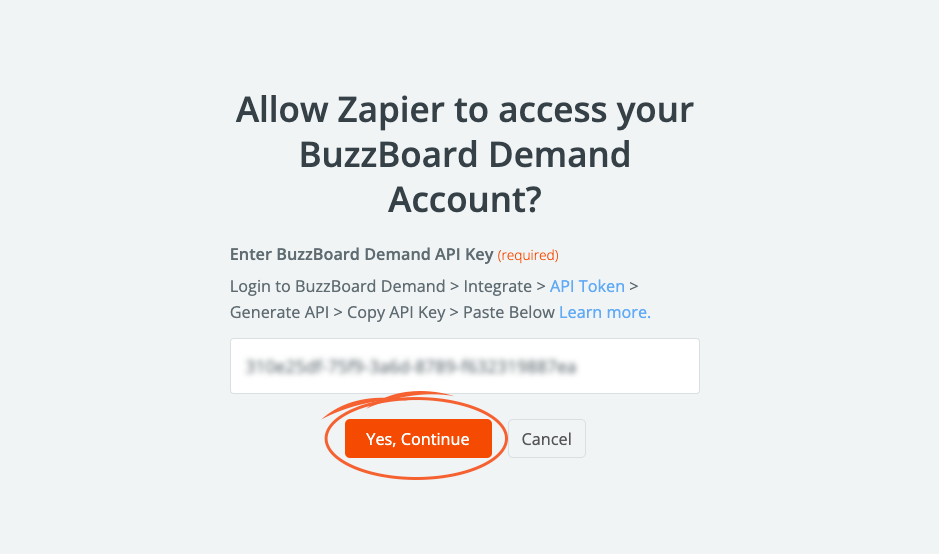
8 To connect your BuzzBoard Demand account, click on Connect a new account and enter your API Token in the Zapier authentication window and click Yes, Continue.
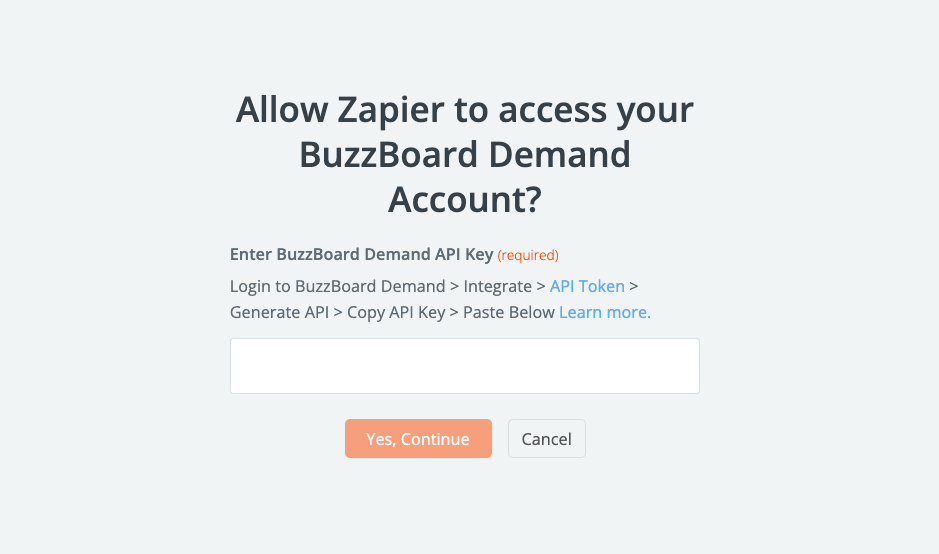
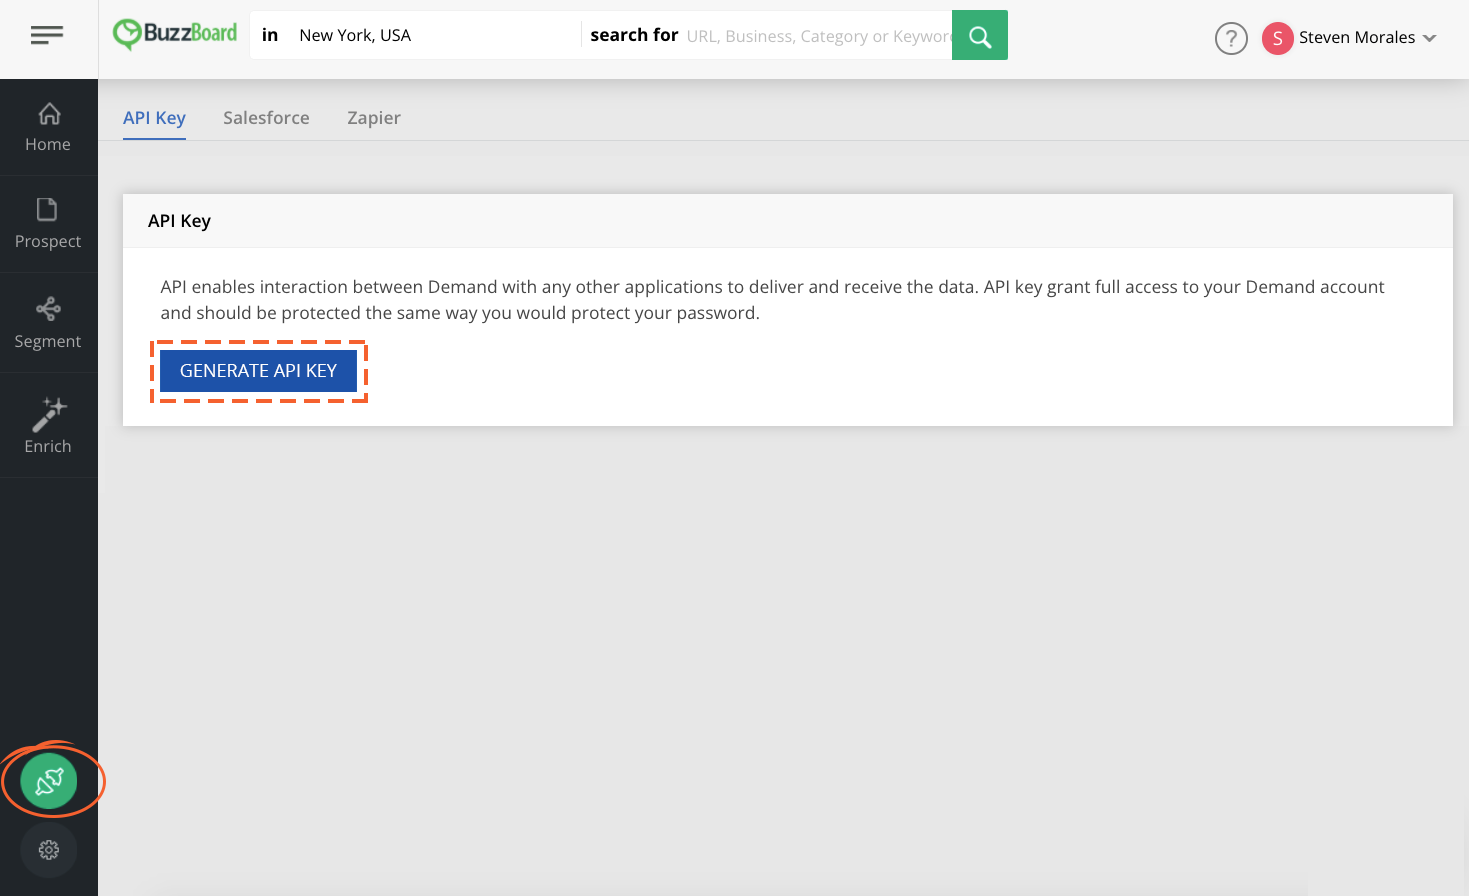
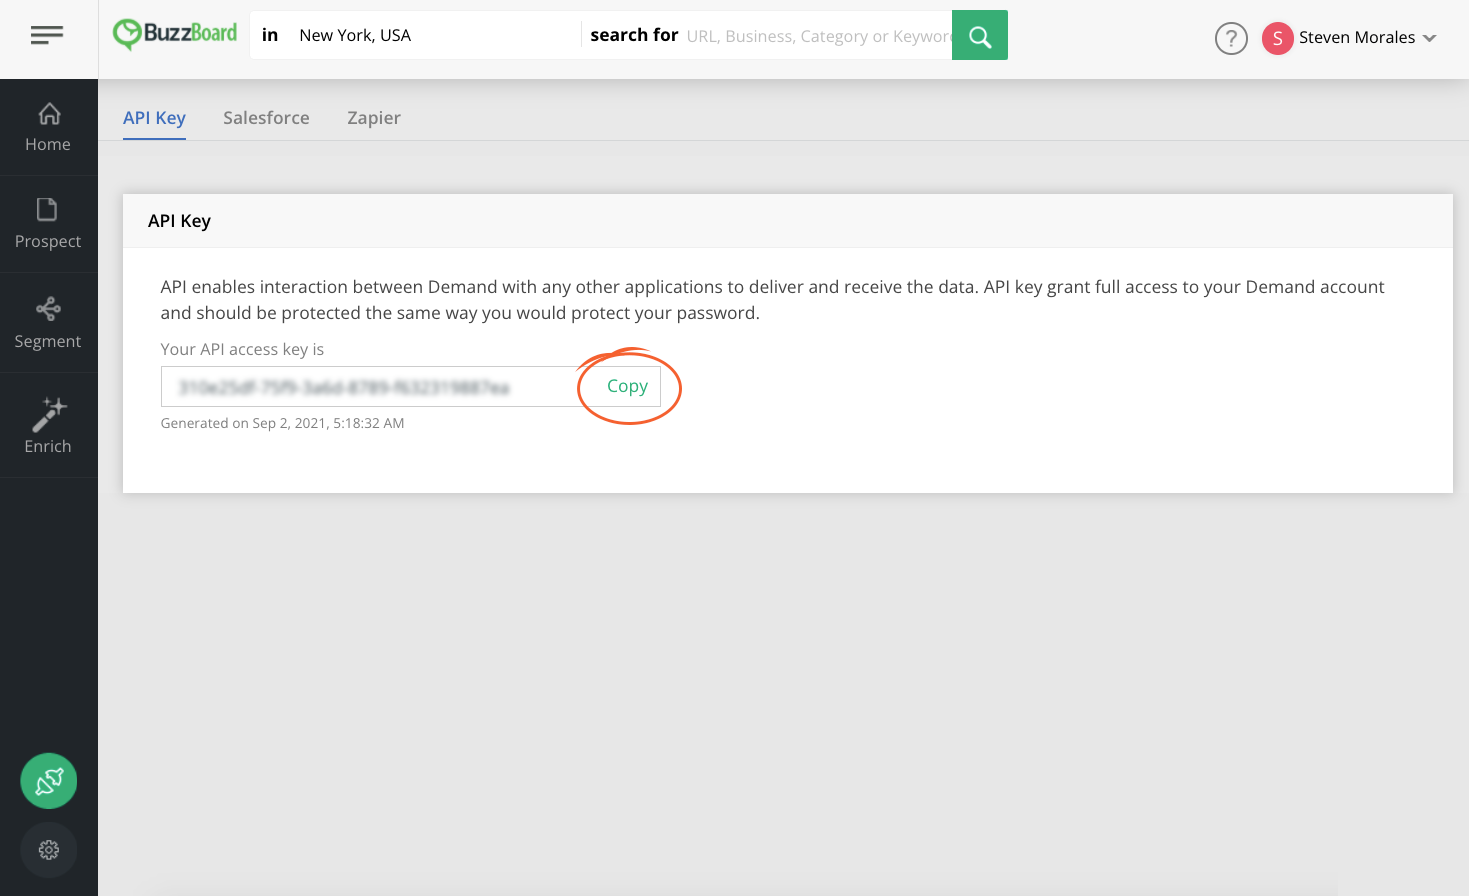
9 To find your personal API Key, Log in to BuzzBoard Demand, Click on the Integrate menu item at the bottom left in the main navigation area, click on the API Key tab and then click on Generate API Key (If you have not previously generated the API Key), Copy the generated API Key and paste in the Zapier authentication window.
(If the API access hasn’t been enabled for your account, please contact your administrator or reach out to support@buzzboard.com.)
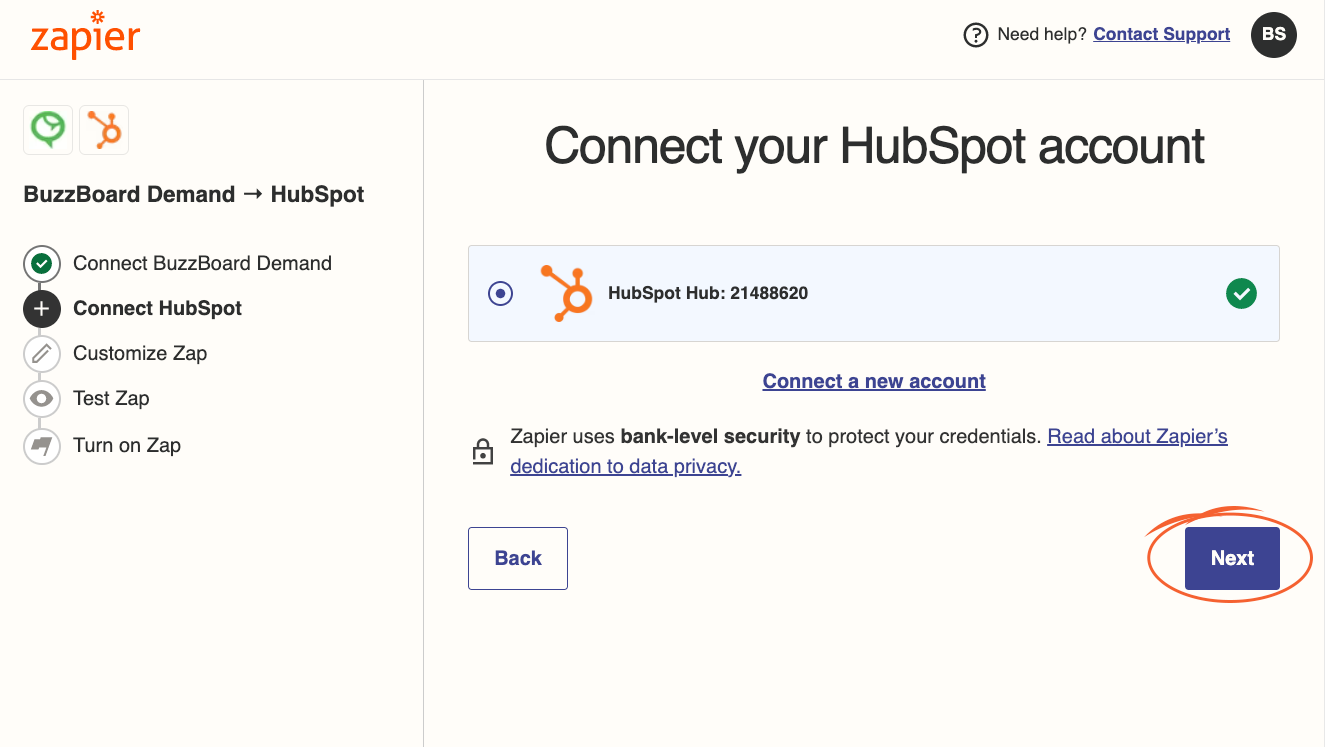
10 After pasting the API Key in the Zapier authentication window, Click on the Yes, Continue button.
11 Your BuzzBoard Demand account has been connected with Zapier. Now, connect your preferred app with Zapier. Your preferred app may be authenticated with a username and password or with an API key. After successful authentication, click on the Next button.
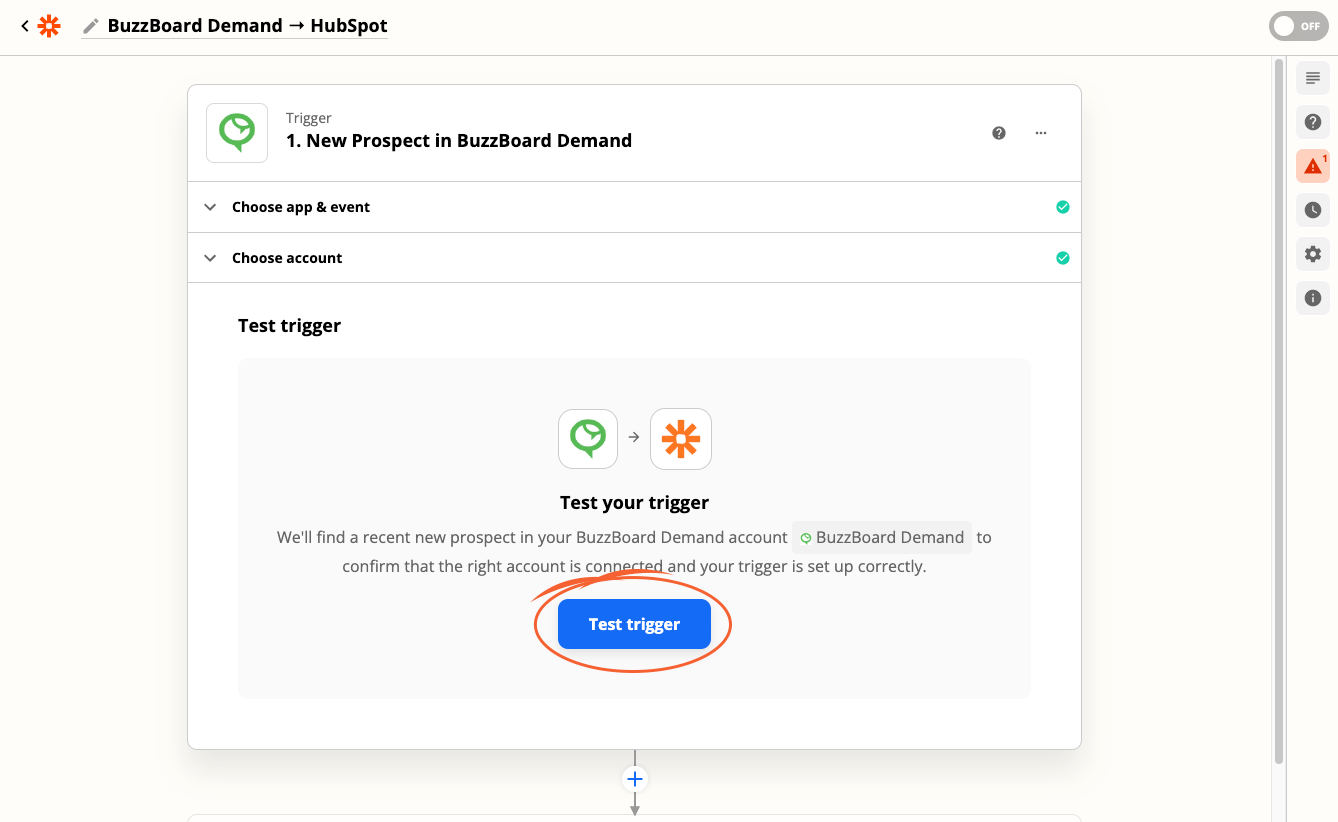
12 Now that you have already chosen the BuzzBoard app and the trigger, Zapier will want to test your trigger to ensure that the Prospects are routed properly. As long as you have at least one Prospect in BuzzBoard Demand, you can test and see the results. Click on the Test Trigger button.
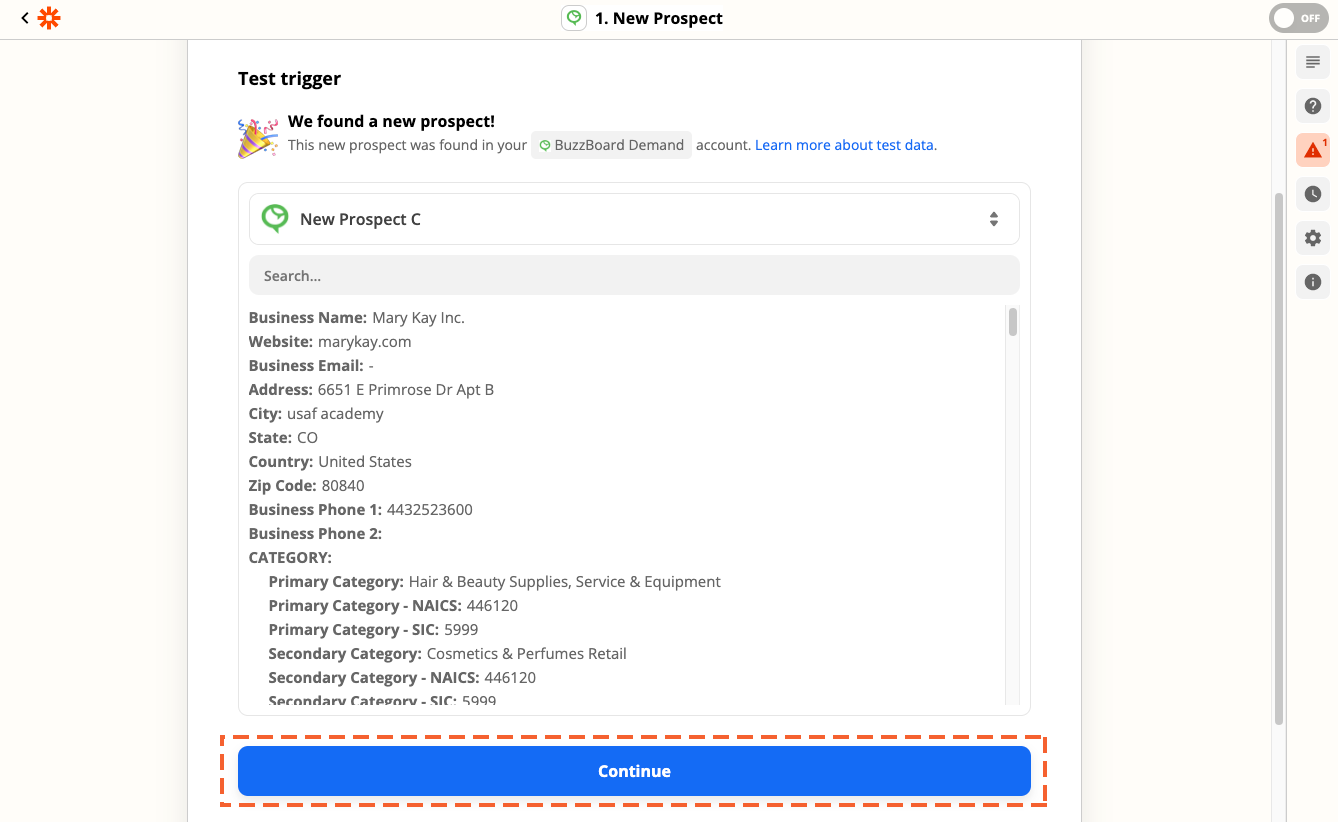
13 After testing, you can view BuzzBoard Demand data samples to ensure that your BuzzBoard Demand trigger has been successfully created. Click on the Continue button.
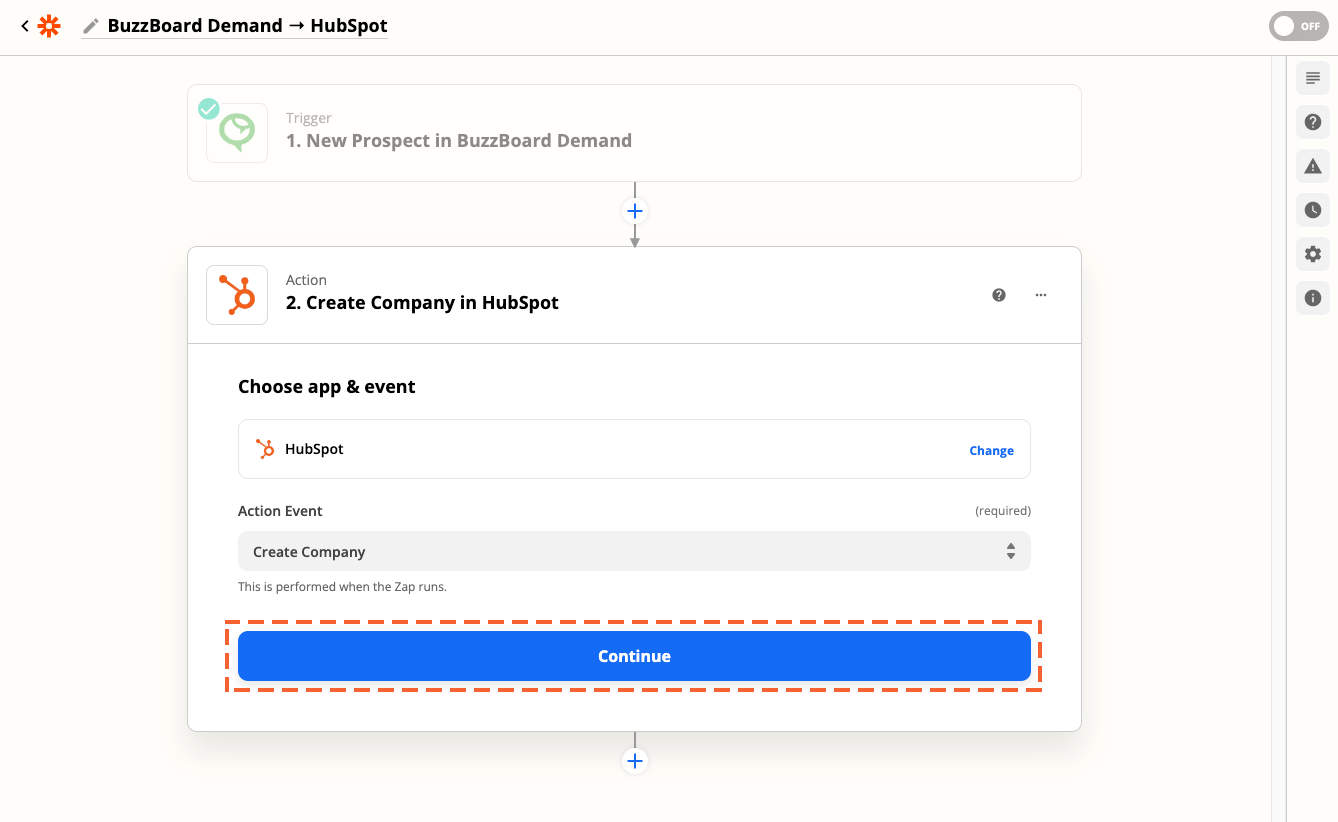
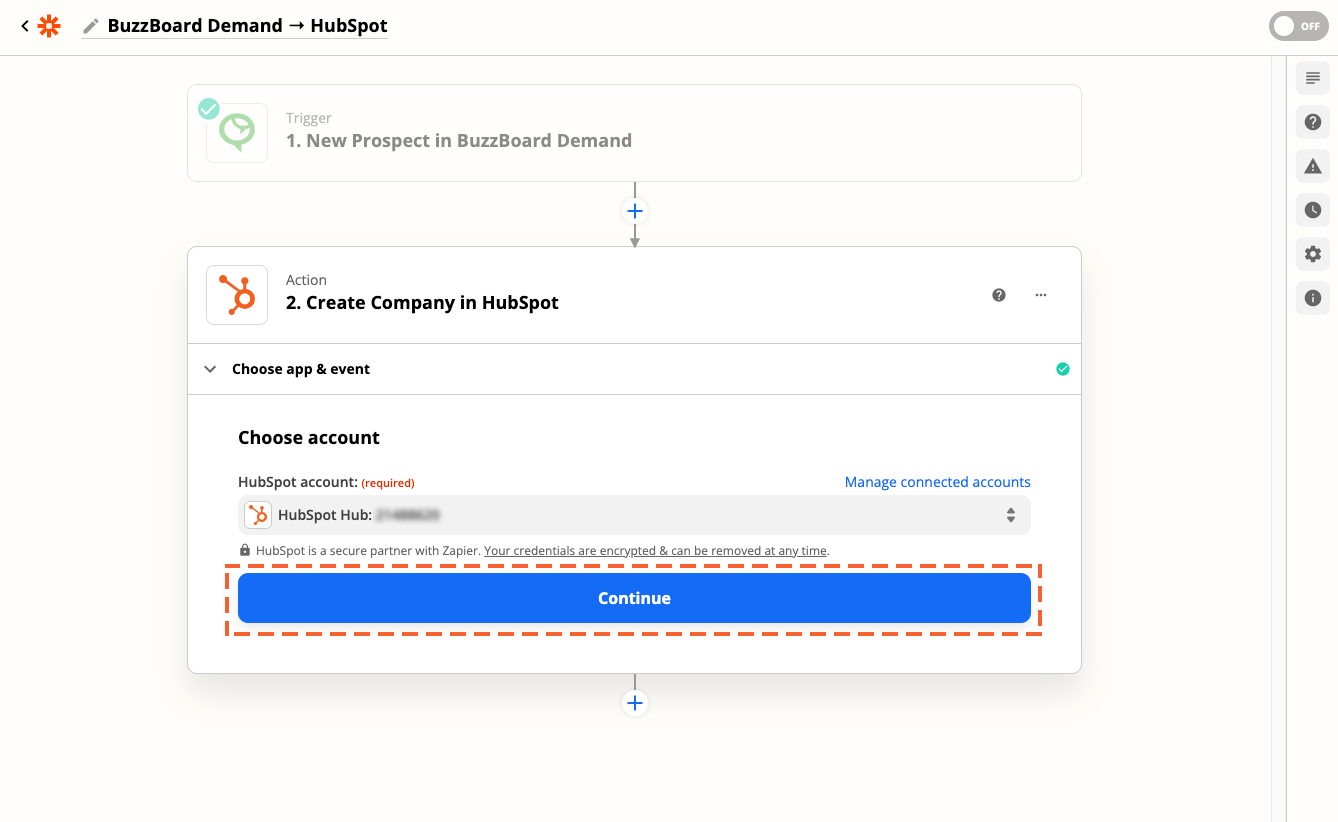
14 Since you have already chosen your preferred app and the action, click on the Continue button.
You can choose any of the apps with which you would like to sync BuzzBoard Demand data and then select any of the action(s) that match the BuzzBoard Demand trigger.
15 Choose your preferred app account and click on the Continue button.
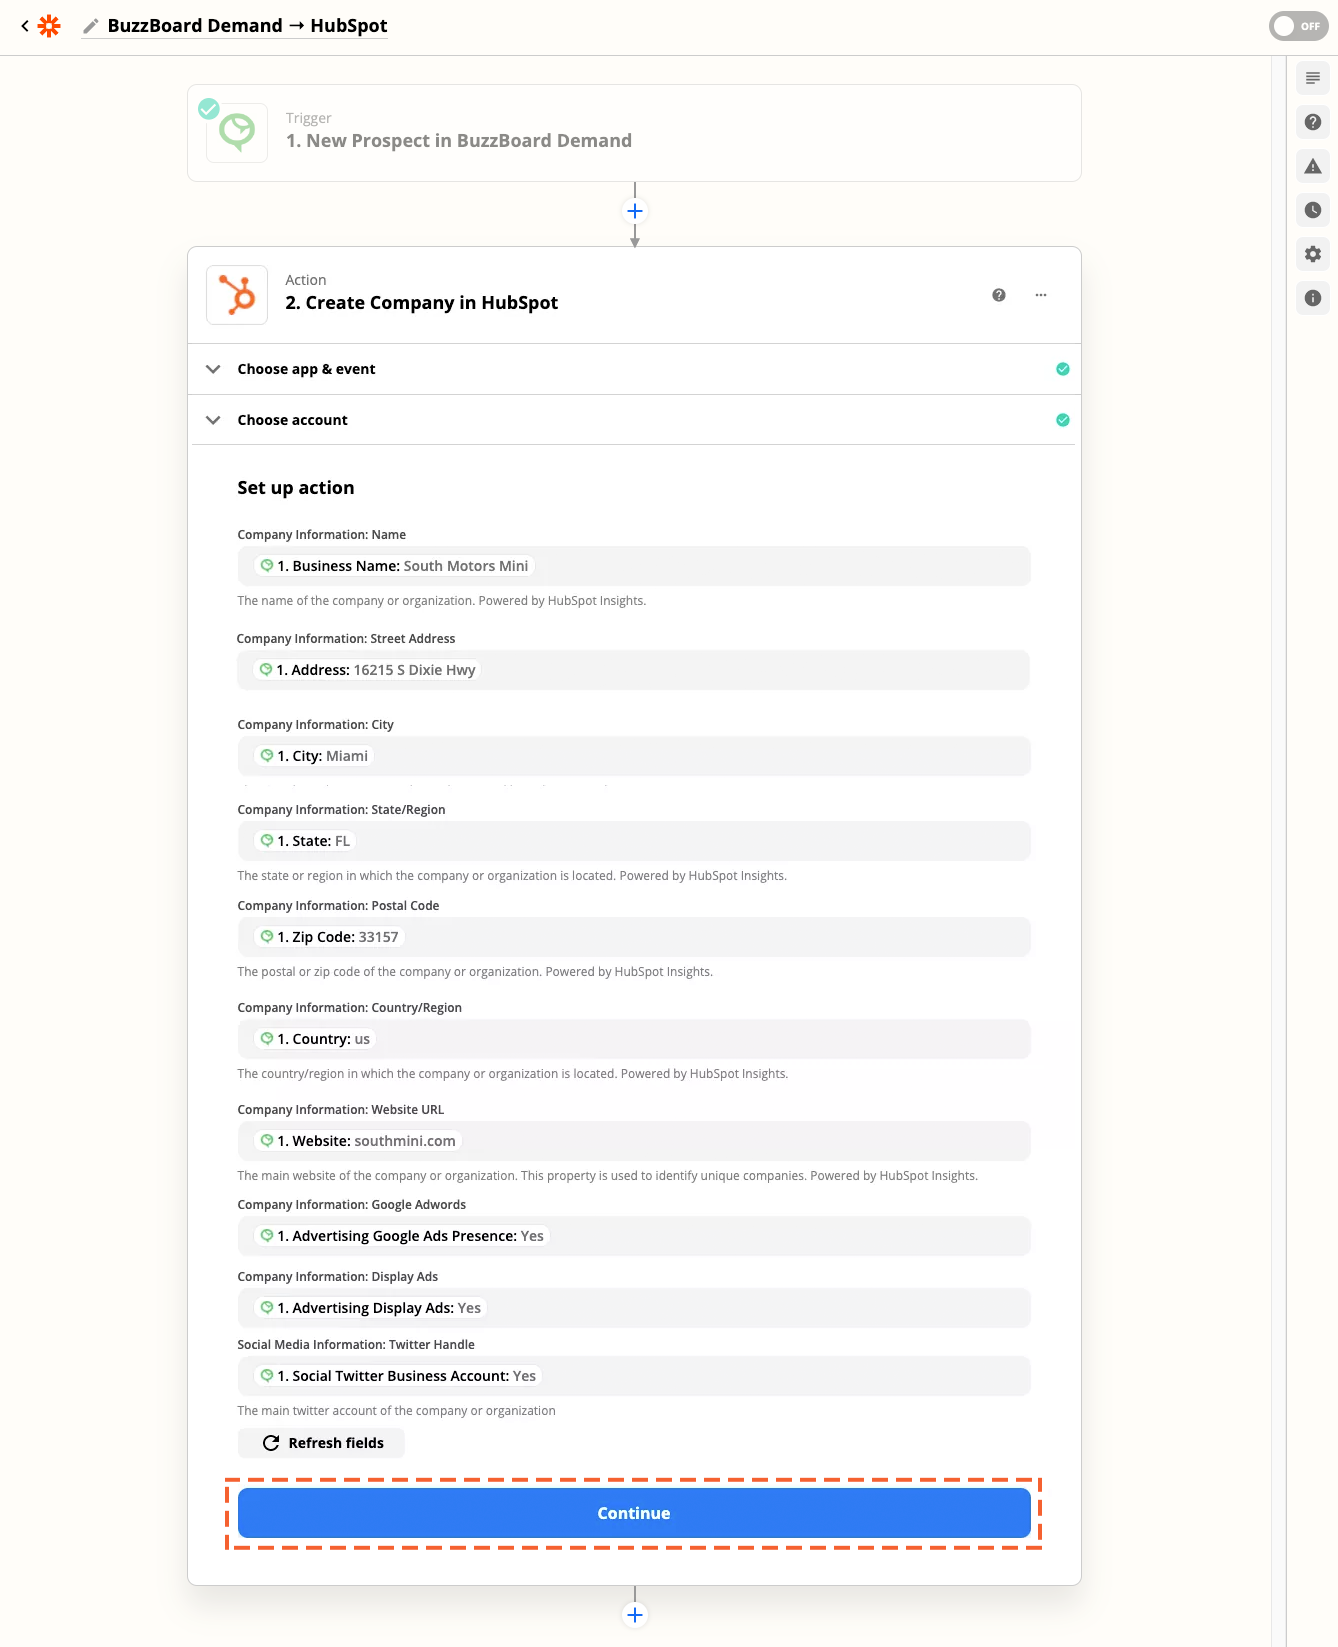
16 Next, you have to map BuzzBoard Demand fields with your preferred app fields and click on the Continue button.
You may have to create custom fields in your preferred app to map the BuzzBoard Demand signals.
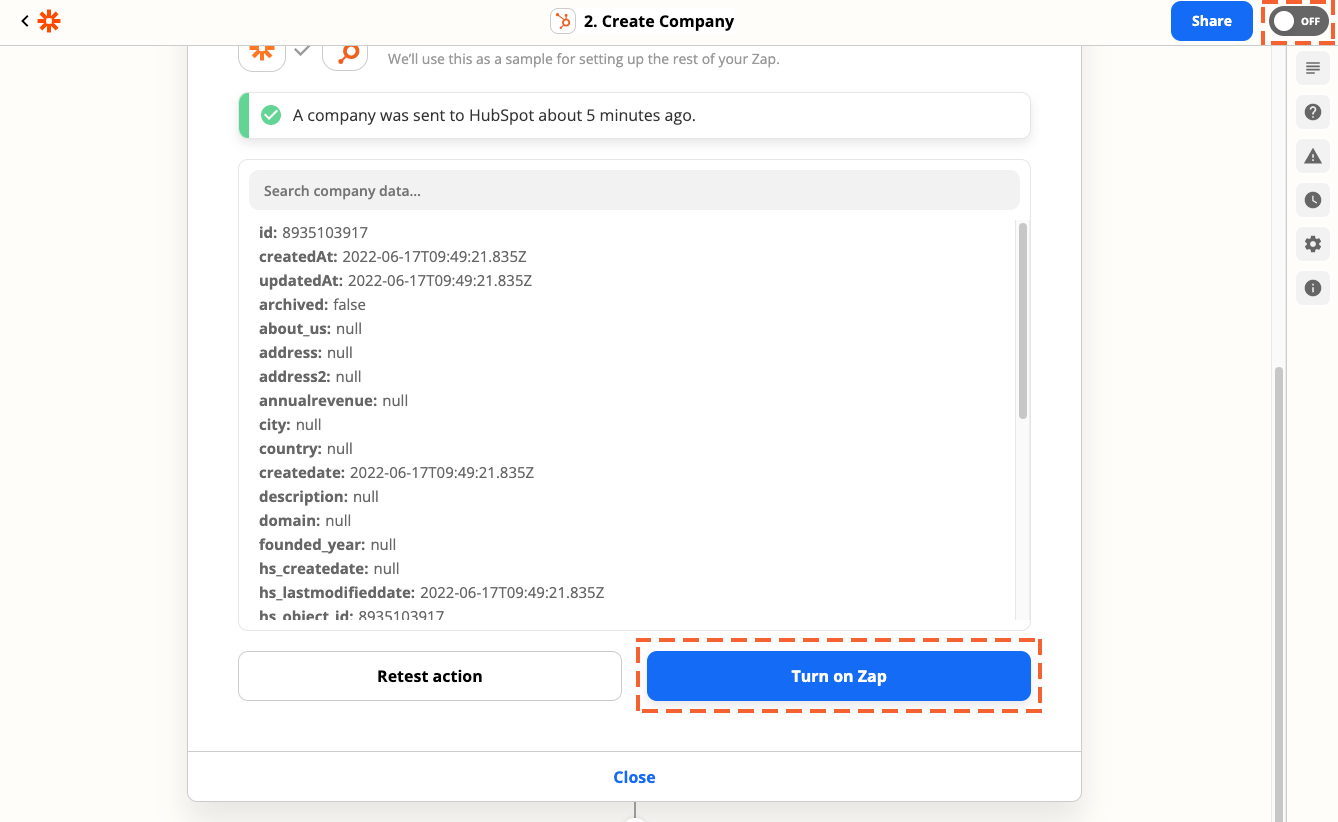
17 Zapier would like to test your preferred app action, to test, click on the Test & Continue button.
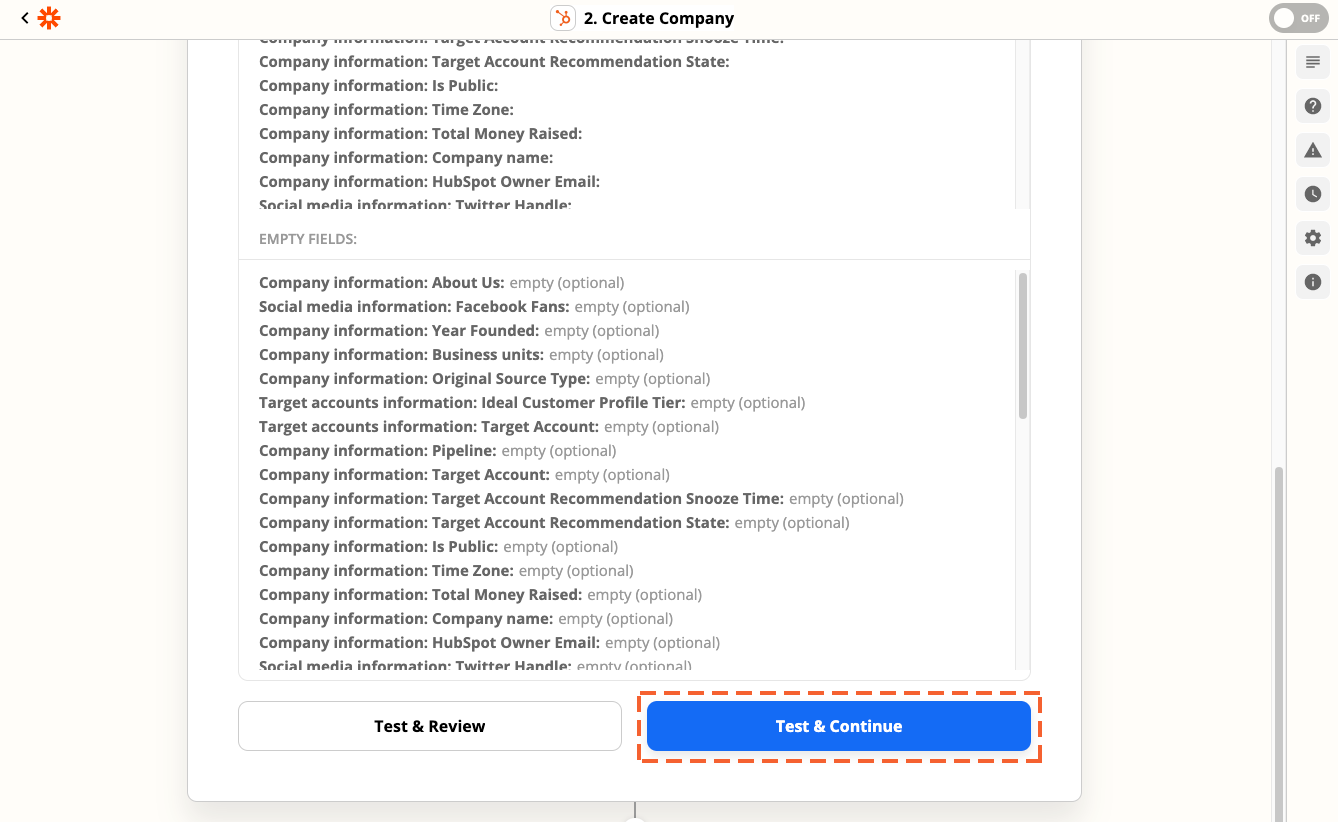
After Successful Testing, Your Zap Is Ready To Turn On.
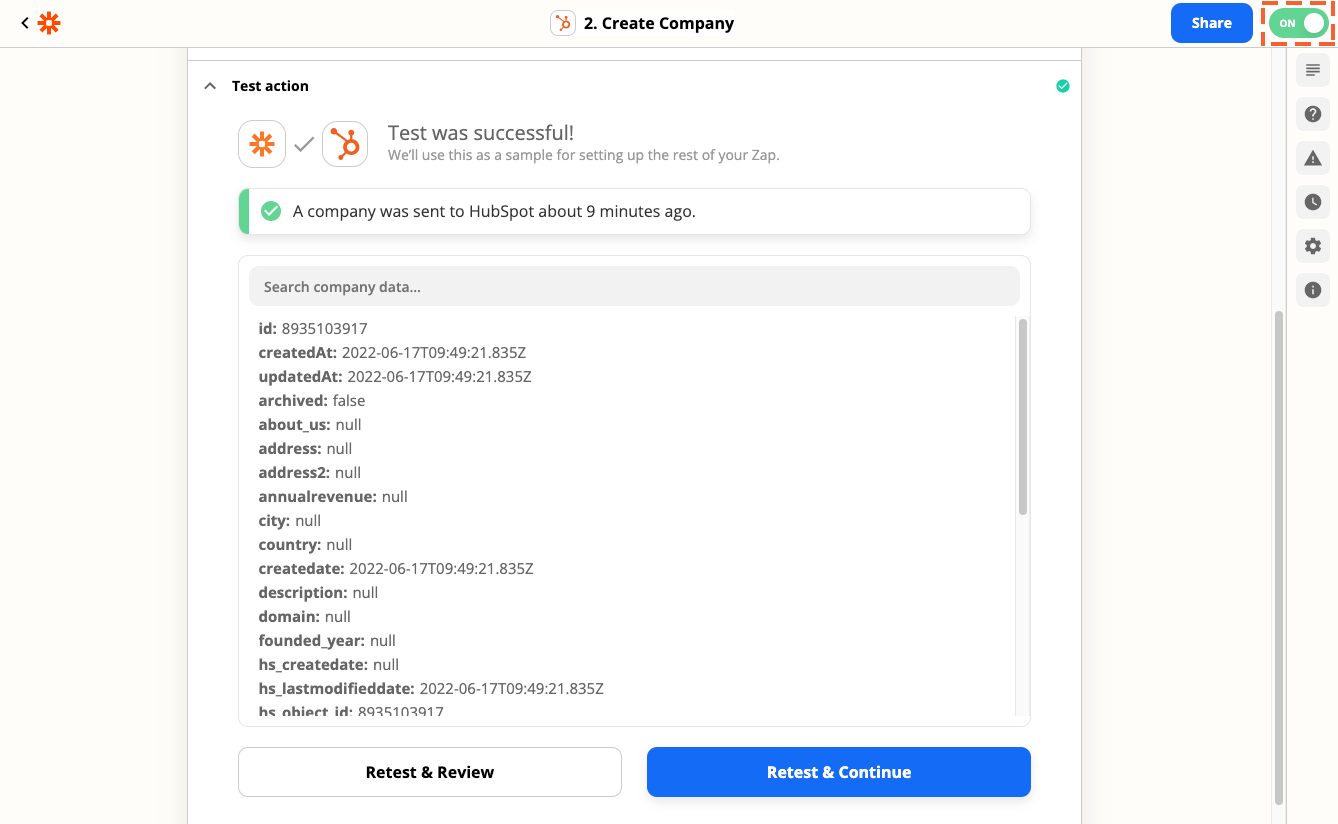
18 Next, give your Zap a name so you can easily identify it on your dashboard. In the upper left, click on the Zap Name and enter a new name for the Zap you created. To add more information about your Zap, click on the gear icon on the right side of the page to open up the settings tab. Once there, you can give your Zap a name,add a description and enter other details. Your changes will be automatically saved.
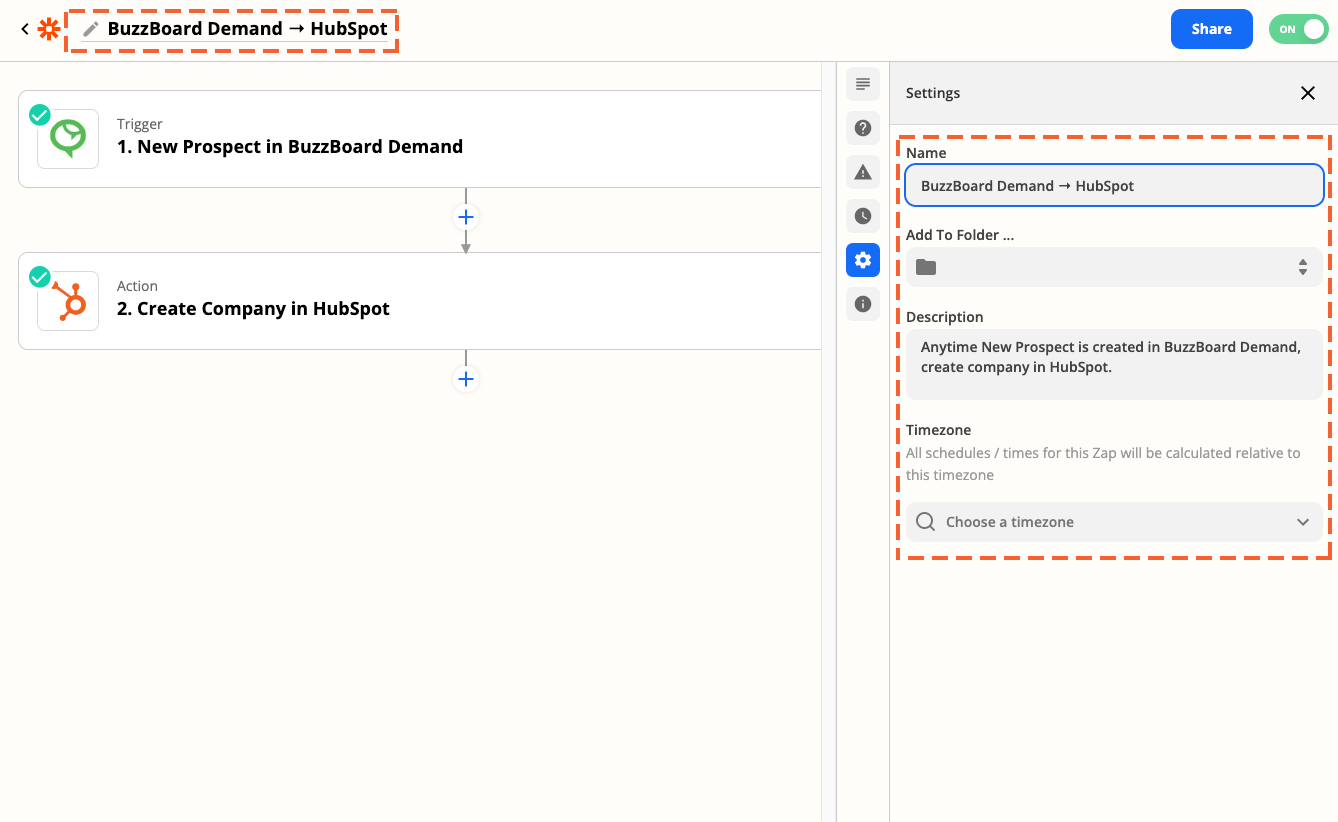
19 After you set up, customize, and name your Zap, the final step is to turn it on. In the upper right, click the toggle switch ON.
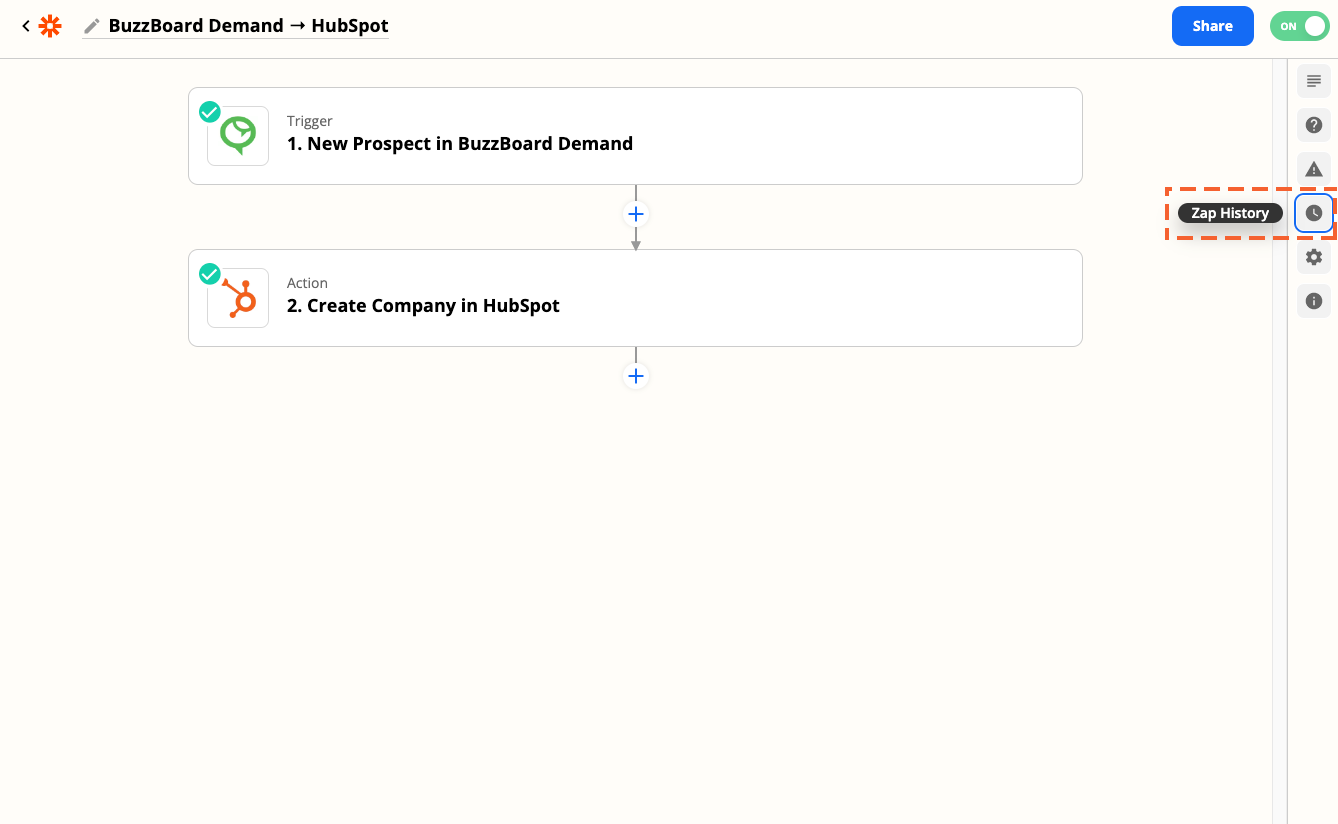
20 Once your Zap is turned on, Zapier will run your action steps each time your trigger event occurs. You can view a log of all your Zap activity, including all the data that goes in and out of each of your Zap steps, in your Zap Task History.
Sync Test
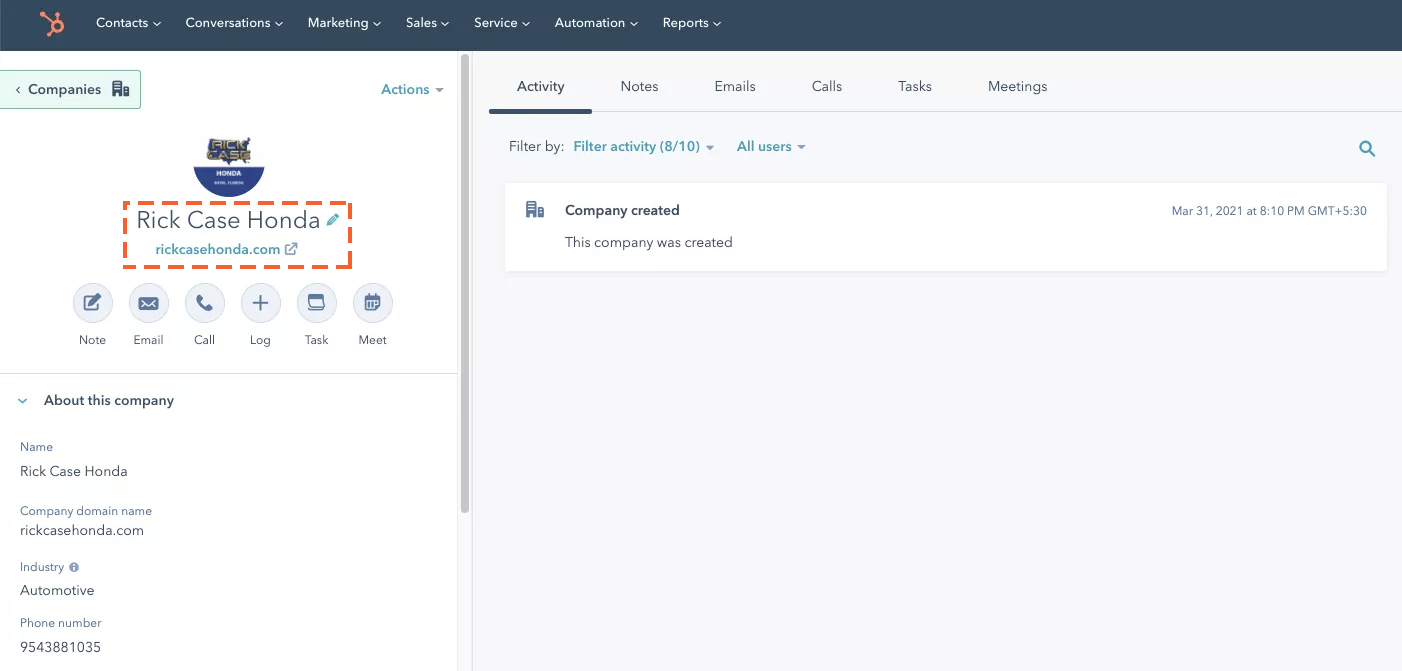
21 You have set up your Zap successfully. Whenever you add a record to BuzzBoard Demand, a new record will be created in your preferred app.
e.g. Added ‘Rica Case Honda’ as a record in BuzzBoard Demand.
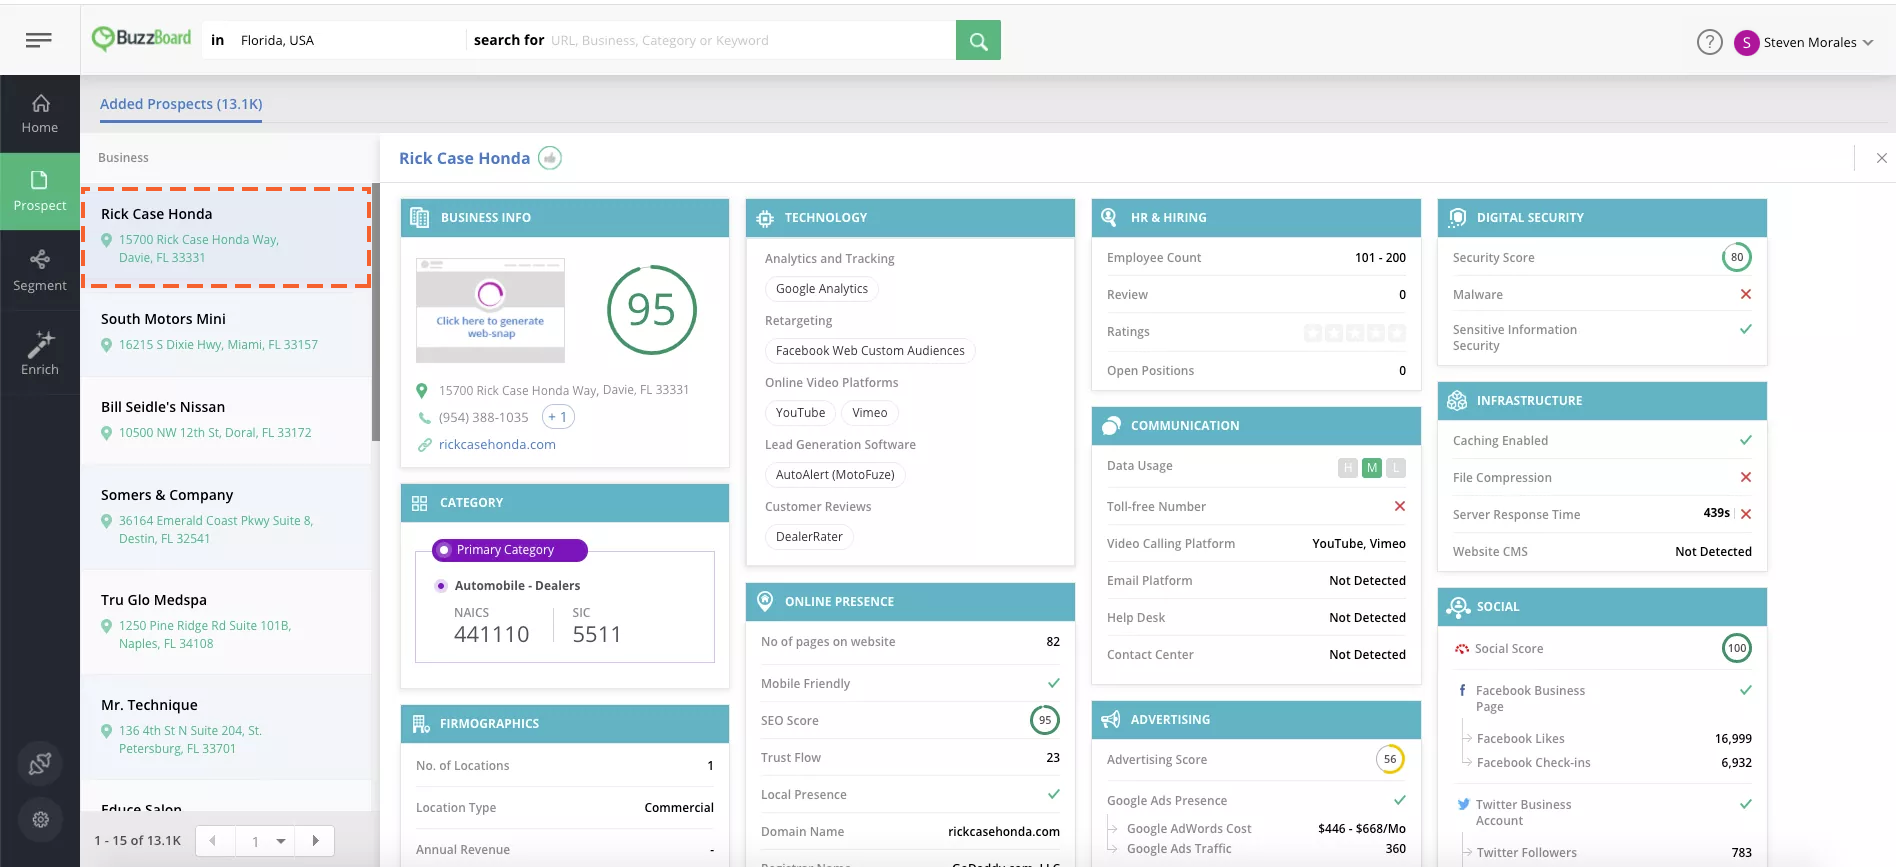
The same record ‘Rica Case Honda’ will be created in your preferred app along with the signals that you have mapped.